DIY Mini Computers: Building Your Own Mini PC
Mini computers have carved their niche in the ever-evolving world of technology as compact powerhouses that offer performance and versatility. Are you interested in creating your very own mini desktop computer? As you will find out, it is easy and affordable to build one of those, which in addition allows for personalizing the construction based on your own needs. Do not fear; we are doing this process with you, and nothing should be concerned.
Now, it’s time to dive into the world of mini-PCs, and we will give you a review of key players on behalf of which model suits you best, bringing information in a step-by-step way. Let's get started on building your perfect mini computer!
What Are Mini Computers?
Did you know that mini computers, also called mini PCs or micro computers, are super cool? These tiny devices are like mini versions of regular desktop computers, but they're still super powerful and packed with features. They are ideal for people who work in confined spaces or those who want a compact unit that they can carry with them wherever they go.
Fortunately, the market is flooded with various options, making it essential to consider your requirements before diving into the DIY project.
Best Mini Computers in the Market
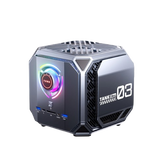
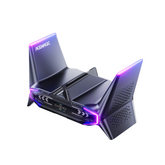
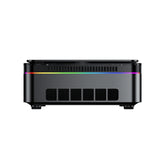
To successfully build a mini PC, it's imperative to have a thorough understanding of the top available options. Some top-rated mini desktop computers that have gained popularity are ACEMAGIC Mini PCs. These compact powerhouses boast impressive specifications and cater to different needs, from casual home use to professional work environments.
Windows Mini PCs: A Versatile Choice
While there are mini desktop computers that run on various operating systems, Windows mini PCs are among the most versatile choices. Being a universal operating system, Windows is best suited for all types of users with different requirements because this OS has a high potential for compatibility with many software and applications.
Additionally, Windows mini PCs often come with user-friendly interfaces, enhancing the overall user experience.

Building Your Own Mini PC
Are you ready to start building your very own mini desktop computer? It's going to be an exciting process! Let's dive in and get started. Follow these steps to ensure a seamless DIY experience:
Define Your Purpose
Determine the primary purpose of your mini PC before selecting components. Depending on whether you're gaming, editing multimedia, or working in the office, your components will differ.
Choose the Right Components
- Processor (CPU): We recommend an Intel Core i5 or AMD Ryzen 5 CPU, which are fast and power-efficient.
- Motherboard: Select a compact motherboard that accommodates your CPU and offers the necessary features.
- RAM: Choose a sufficient amount of RAM for your intended usage, typically 8GB or 16 GB.
- Storage: Consider a fast and compact storage solution, like an M.2 SSD.
- Power Supply: Make sure that the power supply unit (PSU) fits the mini form factor and is of sufficient power.
Assemble the Mini PC
- Carefully install the CPU, ensuring proper alignment.
- Attach the motherboard to the case, securing it in place.
- Install RAM, storage, and any additional components.
- Connect all cables and ensure proper cable management for optimal airflow.
Install the Operating System
- Create a bootable USB drive with the Windows operating system.
- Boot the mini PC from the USB drive and follow the installation prompts.
Customize and Optimize
- Install necessary drivers for your components.
- Customize your desktop and install essential software.
- Optimize settings for performance and energy efficiency.
Benefits of Mini PCs
Building your own mini PC comes with several advantages, making it an appealing choice for tech enthusiasts and professionals alike:
- Space-Saving: Mini desktop computers are compact and take up minimal space, making them perfect for small offices, living rooms, or workstations with limited real estate.
- Energy Efficiency: Mini PCs are designed to be energy-efficient, contributing to a smaller carbon footprint and lower energy bills.
- Portability: The compact size of mini computers allows for easy portability, making them ideal for users who need computing power on the go.
- Customization: Building your own mini PC allows for customization based on your specific needs, ensuring optimal performance for your intended use.
Things to Consider Before Build a Mini PC
A mini computer is a small, light personal computer that can be built from scratch and used for work or play. These computers are typically more powerful than laptops, but they still use less power. In addition, they are typically cheaper than a desktop PC. They can also be easily transported if necessary. However, building a mini-computer can be challenging for novices. It is important to select the right components and carefully check them for compatibility. The following are some tips to help make the process easier.
There are many different types of mini computers available in the market today, including barebones and desktop systems. Barebones are usually cheaper, but they do not include a hard drive or RAM. On the other hand, desktop computers are more expensive and may require extra components such as a power supply or motherboard.
Before choosing a model, it is essential to know how much space you have available and what kind of programs you will be using. It is also important to consider the system's power requirements. Ideally, you should choose a desktop PC that uses low-power processors and graphics cards. This will save on energy consumption and reduce heat output.
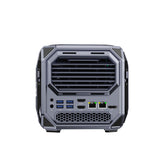
It is also helpful to decide what type of ports you will need on your desktop computer. You will need at least one USB port, and most computers will have HDMI, RCA video out and audio jacks. You should also consider the cooling system since computing generates heat. Ensure that your mini PC has an efficient fan and heat sinks. It is also important to route cables properly and use cable ties or zip ties to keep them organized.
If you are planning on using your small factor PC for gaming, it is important to find a suitable GPU. Graphics cards can significantly affect a game’s performance and visual quality. To determine which card is best for your needs, visit each game’s website and read its required, recommended, and maximum specifications. If you are willing to sacrifice visual quality for performance, you can use a budget-friendly AMD GPU.
While assembling your mini computer, be sure to triple-check its components for compatibility. It is especially important to ensure that the motherboard and CPU sockets match. A mismatched socket will result in a failure to boot or an inability to install the correct drivers. It is also important to ensure that the memory slots are the correct size for your chosen type of RAM.
Once you have finished assembling your small PC, you can connect it to an external monitor and start working or playing. Depending on your choice of program, you can even connect it to a television and use it as a home entertainment center. You can also choose to add a keyboard and mouse for more control over your system. If you have a good enough processor and graphics card, you can even use your desktop computer for video editing or other more advanced tasks.
Get Prebuilt Mini PCs From ACEMAGIC
ACEMAGIC has established itself as the global frontrunner in small computers, offering an extensive selection of mini PCs that cater to diverse user needs. Renowned for the latest technology, ACEMAGIC leads the industry by providing a wide range of cutting-edge mini desktop computers. Whether it's a compact design, high performance, or energy efficiency, ACEMAGIC's mini PCs set the standard.
With a commitment to quality and versatility, ACEMAGIC continues to dominate the market, ensuring users worldwide have access to top-rated mini computers that redefine the boundaries of computing technology.
FAQs
How to Transfer Mini DV Tapes to a Computer?
If you want to transfer mini DV tapes to a computer, you'll need a DV camcorder with a Firewire connection, a Firewire cable, and video editing software. Connect the camcorder to your computer, import the footage using the software, and save the files.
How to Build a Mini Computer?
To build a mini computer, select components like a CPU, motherboard, RAM, storage, and a compact case. Assemble the parts carefully, install an operating system, and customize settings for optimal performance.
How to Connect Google Home Mini to a Computer?
To connect Google Home Mini to a computer, use Bluetooth or a 3.5mm audio cable. Activate Bluetooth on your computer, follow the pairing instructions, or plug in the cable to the audio output of your PC and the input on the Google Home Mini.
How to Choose the Best Mini Desktop Computer?
When choosing the best mini desktop computer, consider factors like CPU, RAM, storage, and form factor. Assess your usage requirements, check reviews, and opt for a reputable brand with a history of delivering reliable mini PCs.
Why Should I Buy a Mini Computer For Desk?
Investing in a mini computer for your desk offers several compelling advantages. Firstly, mini PCs are space-efficient, so they are perfect for home offices or smaller workspaces. Their compact design doesn't compromise on performance, ensuring you get a powerful computing experience without the need for a bulky setup. Additionally, mini computers often consume less power, contributing to energy efficiency. With advancements in technology, mini desktop computers have become versatile solutions, providing the computing power you need while maintaining a sleek and tidy desk space.


Leave a comment
Please note, comments need to be approved before they are published.