How to Connect AirPods to a Windows computer?

Before pairing your AirPods with a Windows computer, take a moment to prepare both devices. These quick checks help avoid connection errors and save time later.
- Charge your AirPods: Keep the battery above 50%. Low battery levels can cause Bluetooth pairing or sound interruptions.
- Turn on Bluetooth on your computer: Go to Settings → Bluetooth & devices, then toggle Bluetooth On so your computer is discoverable.
- Update Windows: Open Settings → Windows Update → Check for updates to make sure your system and Bluetooth drivers are current.
- Disconnect AirPods from other devices: Remove any active connections to phones or tablets nearby to prevent conflicts.
- Keep devices close: Maintain a distance of about 1–2 meters between your computer and AirPods for a stable connection.
Running through these checks once reduces the likelihood of connection errors such as “AirPods not connecting to PC” or “AirPods connection failed.”
How to Access Bluetooth Settings Quickly
Windows offers several quick ways to reach Bluetooth settings. The goal is to ensure Bluetooth is visible, active, and ready for pairing.
Option 1: Keyboard Shortcut
- Press Windows + I to open Settings.
- Navigate to Bluetooth & devices.
- Confirm the switch is set to On.
Option 2: Taskbar Access
- Click the Network, Sound, or Battery icon on the taskbar.
- Select the Bluetooth icon.
- Toggle Bluetooth to turn it on or off.
Option 3: Search Bar
Type “Bluetooth” in the Windows search bar and select Bluetooth and other devices settings. This shortcut opens the main pairing interface directly.
Once Bluetooth is enabled, keep the settings window open. You’ll use it in the next step when adding your AirPods as a new device.
Proper preparation ensures that your AirPods pair smoothly on the first attempt. The next section will guide you through each step of connecting your AirPods to a Windows 10 or Windows 11 computer.
How to Connect AirPods to a Windows computer
Once both your devices are ready, you can start the pairing process. Windows 10 and 11 share similar menus, so these steps work for both versions. Following them in order ensures your AirPods connect correctly and appear as the active audio device.
Step 1 – Open Bluetooth Settings on Your computer
Open Bluetooth settings to start pairing.
- Select Start → Settings.
- Go to Bluetooth & devices.
- Click Add device and select Bluetooth.
- Keep this window open. You’ll select your AirPods in the next step.
This screen displays all nearby Bluetooth devices, so make sure your AirPods are close to your computer. If you don’t see them, continue to Step 2.
Step 2 – Put AirPods in Pairing Mode
Pairing mode allows your AirPods to be visible to Windows.
- Place both AirPods in their charging case.
- Open the lid, but do not remove the AirPods yet.
- Press and hold the setup button on the back of the case until the LED indicator flashes white.
- The flashing white light means your AirPods are now in discovery mode.
If the LED stays amber, charge the case briefly before retrying. AirPods that aren’t charged won’t enter pairing mode.
Step 3 – Select AirPods from Available Devices
After the LED flashes white, return to your computer screen.
- Look for your AirPods name (for example, AirPods Pro or John’s AirPods) in the device list.
- Click the name to start pairing.
- Wait until the status changes from Connecting to Connected.
When connected, Windows plays a short sound to confirm. You can also verify connection status under Settings → Bluetooth & devices, where your AirPods will appear as “Connected voice, music.”
If the connection fails, close the lid of the case for 10 seconds, reopen it, and try again.
Step 4 – Confirm Audio Output
Once paired, Windows should automatically route sound through your AirPods. Confirm this by adjusting audio settings:
- Open Settings → System → Sound.
- Under Output, select your AirPods from the list.
- Click Test to play a sample tone.
- Confirm that you hear the sound clearly through both earbuds.
You can also switch output quickly by clicking the sound icon on the taskbar, then selecting your AirPods from the drop-down menu.
If you hear no sound, proceed to the troubleshooting section later in this guide.
Quick Reference: Connection Flow
| Step | Action | Result |
| 1 | Open Bluetooth settings | The computer is ready to detect devices |
| 2 | Put AirPods in pairing mode | LED flashes white |
| 3 | Select AirPods in the list | Connection established |
| 4 | Confirm output | AirPods play sound from the computer |
This setup process typically takes less than two minutes. Once completed, your AirPods should reconnect automatically when Bluetooth is on and the case is opened nearby.
Manage AirPods Connection on Windows
After pairing your AirPods with a Windows computer, you can manage their connection directly through system settings. This section explains how to disconnect, reconnect, and remove your AirPods when switching devices or troubleshooting connection issues. It also covers simple habits that keep your AirPods connected more reliably.
Disconnect or Reconnect AirPods
You can toggle your AirPods connection without removing them from your paired devices list. This is useful when you temporarily switch between your phone and computer.
To disconnect:
- Open Settings → Bluetooth & devices.
- Locate your AirPods in the device list.
- Select the three-dot menu (⋯) next to their name.
- Click Disconnect.
Once disconnected, the AirPods remain paired and can reconnect later without repeating the full setup process.
To reconnect:
- Reopen the AirPods case near your computer.
- Open Bluetooth & devices again.
- Click Connect next to your AirPods.
Alternatively, you can reconnect quickly from the taskbar:
- Click the sound icon → Select the arrow next to output device → Choose your AirPods.
This method is faster and doesn’t require opening full settings.
How to Remove and Re-pair AirPods
When AirPods stop responding or when you want to use them with another device, it’s best to remove and re-pair them.
Steps:
- Go to Settings → Bluetooth & devices.
- Find your AirPods in the paired list.
- Click the three-dot menu → Select Remove device.
- Close and reopen the AirPods case.
- Hold the setup button on the back of the case until the LED flashes white.
- Add them again through Add device → Bluetooth → [AirPods Name].
Re-pairing clears previous connection data, which often resolves “AirPods not connecting to PC” or “AirPods connection failed” problems.
Auto-Reconnection Tips
Windows generally reconnects AirPods automatically when both devices are nearby, but this can fail if multiple devices share the same AirPods. These habits help maintain consistent pairing:
- Keep Bluetooth turned on in Windows.
- Avoid pairing the same AirPods with several PCs simultaneously.
- Make sure no Apple device nearby has an active connection with the same AirPods.
- Keep the lid open for a few seconds after the computer wakes from sleep to help re-establish the link.
Following these small steps improves the reconnection success rate significantly, especially with Windows 11’s newer Bluetooth stack.
Managing your AirPods connection correctly keeps sound output stable and prevents frequent pairing interruptions. Next, we’ll look at how to configure audio and microphone settings to achieve better sound and call quality on Windows.
Advanced Audio and Microphone Settings
Once your AirPods are connected to a Windows computer, adjusting the correct sound and input options ensures clear audio playback and microphone performance. Windows sometimes assigns the wrong audio profile or input device, which can lead to distorted sound or muted calls. This section explains how to configure, compare, and optimize those settings effectively.
Choose AirPods as the Playback and Recording Device
When AirPods connect to Windows, they appear as two audio profiles — Headphones (AirPods Stereo) and Headset (AirPods Hands-Free AG Audio).
The first delivers full-quality sound for media, while the second is optimized for voice calls but reduces sound fidelity. To select the right playback and recording devices:
- Open the Control Panel.
- Go to Hardware and Sound → Sound.
- Under the Playback tab, locate both AirPods entries.
- Right-click Headphones (AirPods Stereo) → Select Set as Default Device.
- Switch to the Recording tab.
- Right-click Microphone (AirPods Hands-Free AG Audio) → Select Set as Default Communication Device.
- Click Apply, then OK.
This configuration ensures your computer uses the stereo profile for audio playback and the microphone profile for calls or meetings.
Optimize Sound and Microphone Quality
Windows sometimes defaults to the “Hands-Free AG Audio” profile even when no call is active. This limits sound range and volume. Setting your AirPods manually as “Stereo” prevents that issue.
| Mode | Purpose | Audio Quality | Microphone Active |
| Headphones (Stereo) | Music, video, streaming | High | No |
| Headset (Hands-Free AG Audio) | Voice calls, conferencing | Low to medium | Yes |
Recommendation:
Use Stereo mode for most tasks and let communication apps switch to “Hands-Free” automatically during calls. If sound remains muffled, disconnect and reconnect your AirPods to refresh the audio driver.
Managing Volume and Input Settings in Apps
Some apps, such as Zoom, Microsoft Teams, and Discord, may require you to set AirPods as input and output devices separately.
Example (Zoom):
- Open Zoom → Settings → Audio.
- Set Speaker: AirPods Stereo.
- Set Microphone: AirPods Hands-Free AG Audio.
- Test both sound and mic before joining a meeting.
The same approach applies to Teams or Discord, where default system devices might not update automatically after pairing. Reviewing these settings once helps prevent “AirPods mic not working on Windows” errors.
Quick Adjustment Tips
- Keep your AirPods firmware updated (it updates automatically when paired with an Apple device).
- Reconnect the AirPods if the sound cuts off after waking the computer from sleep.
- Adjust input volume manually in Sound Settings → Input → Device Properties for clearer voice quality.
Fix Common AirPods Connection Problems on Windows
Even after successful pairing, AirPods users sometimes face issues such as unstable connections, missing audio, or the microphone not working. Windows and Bluetooth compatibility vary across devices, but most problems follow predictable patterns. The solutions below address these common cases step by step.
AirPods Not Showing Up in Bluetooth Devices
If your AirPods do not appear in the list of available devices:
-
Restart Bluetooth services
- Press Windows + R, type services.msc, and press Enter.
- Locate Bluetooth Support Service.
- Right-click → Restart.
- Set the Startup type to Automatic to keep it active.
-
Check Bluetooth driver status
- Open Device Manager → Bluetooth.
- Right-click your adapter → Update driver → Search automatically.
- If the adapter has a yellow warning symbol, reinstall it.
- Restart your computer and repeat the pairing process.
Temporary cache issues can prevent discovery until Bluetooth resets.
Connected but No Sound or Mic
This occurs when Windows assigns the wrong audio profile or fails to switch to your AirPods after pairing.
Fix:
- Go to Settings → System → Sound → Output.
- Select AirPods Stereo as the default output device.
- Under Input, select AirPods Hands-Free AG Audio for the microphone.
- If the issue persists, disconnect and reconnect the AirPods once.
Sometimes Windows prioritizes built-in speakers or other Bluetooth devices. Verifying both input and output ensures the correct profile is active.
AirPods Keep Disconnecting
Frequent disconnections often stem from Bluetooth power-saving settings or wireless interference.
Check the following:
-
Disable power-saving mode for the Bluetooth adapter
- Open Device Manager → Bluetooth → [Your Adapter] → Properties → Power Management tab.
- Uncheck “Allow the computer to turn off this device to save power.”
- Maintain signal range
- Keep your AirPods and computer within 1–2 meters. Bluetooth signal weakens quickly through metal or thick walls. Avoid other active Bluetooth devices
Simultaneous connections from phones or tablets can cause random dropouts. These steps usually stabilize the connection for extended listening or calls.
Reset AirPods and Try Again
Resetting restores AirPods to factory pairing mode and removes cached connection data that might conflict with Windows.
Reset steps:
- Place both AirPods in the case and close the lid for 30 seconds.
- Open the lid.
- Press and hold the setup button on the case for 15 seconds until the LED flashes amber, then white.
-
On your computer, remove the old AirPods entry: Settings → Bluetooth & devices → Remove device.
- Re-pair them again using Add device → Bluetooth.
After resetting, AirPods will pair as new and usually connect without previous issues.
Update Bluetooth Driver or Windows OS
Outdated drivers or Windows builds can disrupt Bluetooth audio handling.
- To update: Open Device Manager → Bluetooth.
- Right-click your adapter → Update driver.
- Select Search automatically for drivers.
- Then, go to Settings → Windows Update → Check for updates.
Keeping both up to date fixes known compatibility issues between AirPods and Windows 10/11.
Troubleshooting Summary Table
| Problem | Likely Cause | Solution |
| AirPods are not visible in Bluetooth | Bluetooth service disabled | Restart Bluetooth Support Service |
| Connected but no sound | Wrong audio output selected | Set “AirPods Stereo” as output |
| Frequent disconnections | Power-saving or interference | Disable power management, stay within range |
| Mic not working | Input device mismatch | Set “Hands-Free AG Audio” as input |
| Persistent connection errors | Cached device data | Reset and re-pair AirPods |
Most connection problems can be fixed with driver updates, correct sound settings, and a short reset process. These steps restore stable pairing without specialized software.
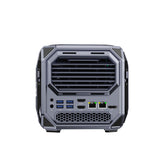
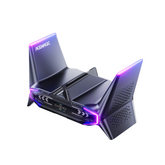
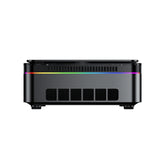
To enhance your everyday AirPods and Windows experience, consider these device featured below — built to deliver a balanced, reliable performance for all kinds of users.
| Efficiency and Stability |
Inspiration and Performance |
Freedom and Efficiency |
|---|---|---|
| Intel Core i9-13900HK | AMD Ryzen AI 9 HX 370 | AMD Ryzen 7 7735HS |
| 32GB RAM + 1TB SSD | 32GB RAM + 1TB SSD | 16GB RAM + 512GB SSD |
| Wi-Fi 6E + BT5.2 | Wi-Fi 7 + BT5.4 | Wi-Fi 6 + BT5.2 |
| ACEMAGIC M1 Mini PC | ACEMAGIC F5A Mini PC | ACEMAGIC RX 16 Laptop |
 |
 |
 |
| Buy Now | Buy Now | Buy Now |
Conclusion
While AirPods are primarily designed for Apple devices, they integrate smoothly with Windows computers after a quick setup. By following this guide, you can connect any AirPods model to Windows 10 or Windows 11 and enjoy reliable wireless audio. Keep this article saved for future reference and continue exploring Bluetooth features to enhance your listening experience on Windows.


Leave a comment
Please note, comments need to be approved before they are published.